

Essential Guide to Vapor Barrier Installation for Homeowners
Understanding Vapor Barrier Installation
What is a Vapor Barrier?
A vapor barrier is a crucial component in building construction, specifically designed to prevent moisture migration from the ground into the living space above. Typically made from polyethylene plastic sheeting or similar materials, a vapor barrier creates an impermeable layer that inhibits moisture from permeating through, thus preserving the structural integrity of the building and enhancing indoor air quality.
Purpose and Benefits of Vapor Barrier Installation
The primary purpose of installing a vapor barrier is moisture control. By preventing water vapor from entering basements or crawl spaces, it helps mitigate issues such as mold growth, wood rot, and damage to insulation. Moreover, effective Vapor Barrier Installation enhances overall energy efficiency in homes by maintaining consistent temperature levels. This reduction in moisture-related problems leads to a healthier living environment and extends the lifespan of building materials.
Common Materials Used for Vapor Barriers
Common materials for vapor barriers include:
- Polyethylene Sheets: The most widely used, offering excellent moisture resistance.
- Foil-Backed Insulation: Combines insulation properties with moisture control.
- Spray-On Barriers: Flexible solutions suitable for complex spaces or irregular shapes.
Each material has its advantages, depending on the specific conditions of the crawl space or basement, as well as the local climate and building codes.
Preparing for Vapor Barrier Installation
Assessing the Crawl Space Condition
Before proceeding with the vapor barrier installation, it is critical to assess the crawl space’s condition. Identify any existing moisture issues, signs of pest infestations, and the overall structural integrity of support beams and joists. Check for visible mold or mildew, as these indicate not only moisture but potential airflow problems that may require additional solutions, such as ventilation improvements.
Gathering Essential Tools and Materials
Proper preparation involves gathering necessary tools and materials for the installation process:
- Measuring tape for accurate sizing.
- Utility knife for cutting vapor barrier material.
- Tape measure and scissors for fitting and adjustments.
- Stapler or adhesive for securing the barrier.
- Safety glasses and gloves for protection.
Having these items ready before starting will streamline your installation process significantly.
Safety Precautions During Installation
Safety should be a paramount concern during vapor barrier installation. Ensure your work area is free of hazards, and wear appropriate personal protective equipment (PPE), such as gloves and a dust mask, especially if you’re working in a confined or dusty space. Additionally, it’s advisable to have good lighting to prevent accidents while navigating the crawl space.
Step-by-Step Guide to Vapor Barrier Installation
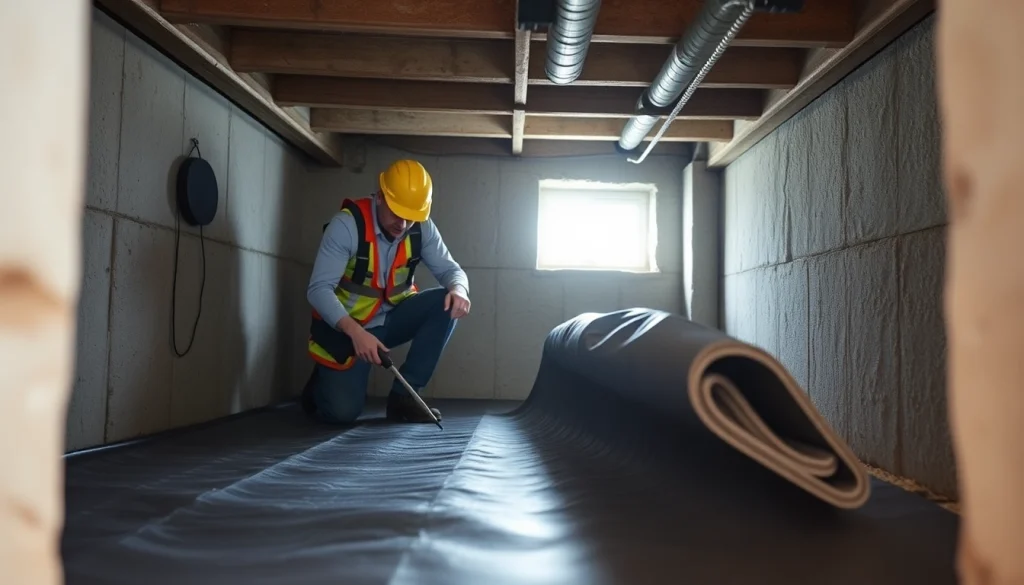
Preparing the Crawl Space
Start by cleaning the crawl space thoroughly. Remove any debris, old insulation, or obstructive materials that could interfere with the vapor barrier installation. Look for damp spots and ensure the area is dry; if necessary, take measures to correct any leaks or drainage issues before proceeding.
Measuring and Cutting the Vapor Barrier
Once the area is ready, measure the crawl space dimensions to determine how much vapor barrier material you need. Allow extra material for overlaps at seams and edges, typically around 12 inches. Carefully cut the polyethylene sheeting using a utility knife, ensuring you make clean cuts to minimize potential vulnerabilities in the barrier.
Securing the Vapor Barrier
With the vapor barrier cut to size, lay it out on the ground, ensuring it extends up the walls of the crawl space. Use a stapler or adhesive to secure it to the walls, making sure it overlaps at seams. Seal any penetrations or edges with appropriate duct tape to prevent gaps that could allow moisture intrusion.
Maintaining Your Vapor Barrier
Regular Inspections and Maintenance Tips
After installation, regular inspections of your vapor barrier are crucial for long-term effectiveness. Examine the barrier every six months for any signs of damage, such as tears or discoloration. Additionally, assess the crawl space’s humidity levels with a hygrometer; levels should ideally remain below 60% to prevent mold growth.
Signs of a Failing Vapor Barrier
Watch for indicators that your vapor barrier may be failing, such as:
- Increased humidity inside the home.
- Visible mold or mildew in the crawl space.
- Persistent musty odors.
- Condensation forming on pipes or walls.
If you notice any of these signs, take action quickly to address the cause, whether that means repairing the vapor barrier or seeking a professional assessment.
Repairing or Replacing the Vapor Barrier
If your vapor barrier requires repair, remove the damaged section and replace it with new material, sealing any seams thoroughly. In cases where extensive damage is found, consider replacing the entire barrier to ensure optimal performance. Ensure you retry all prior preparation steps if reinstalling the barrier.
Frequently Asked Questions about Vapor Barrier Installation
How often should I replace my vapor barrier?
Generally, a vapor barrier can last 5 to 10 years. However, inspection is advised every six months to determine if replacement is needed sooner due to damage or wear.
Can I install a vapor barrier myself?
Yes, vapor barrier installation can be a DIY project. However, ensure to follow safety guidelines and best practices for effective moisture control.
What are the signs of moisture problems?
Look for issues like mold growth, water stains, peeling paint, and musty odors. These signals indicate moisture is present and could compromise your home’s integrity.
Is a vapor barrier necessary in all climates?
While not mandatory in every climate, vapor barriers are highly recommended in humid areas or regions with significant temperature fluctuations to prevent moisture problems.
How does a vapor barrier improve energy efficiency?
A vapor barrier reduces humidity, stabilizes indoor temperature, and prevents air leaks, contributing to improved energy efficiency and lower utility bills.