

Step-by-Step Guide to Ductless Mini-Split Installation for Optimal Comfort
Understanding Ductless Mini-Split Installation
As homeowners increasingly seek efficient heating and cooling solutions, ductless mini-split systems have emerged as a popular choice. Their flexible design and energy efficiency make them an attractive option for various spaces. This comprehensive guide will delve deeply into ductless mini-split installation, exploring what they are, their benefits, the installation process, and post-installation considerations.
What is a Ductless Mini-Split System?
A ductless mini-split system is a heating and cooling solution that operates without ductwork. Consisting of two primary components—a wall-mounted indoor unit and an outdoor compressor unit—it allows for zoned heating and cooling. The interior units are installed directly into the rooms they serve, making them highly customizable. These systems use inverter technology to balance temperatures efficiently, which can lead to significant energy savings.
Advantages of Ductless Mini-Split Installation
- Energy Efficiency: Ductless mini-split systems often boast energy efficiency ratings higher than traditional HVAC systems, translating to lower energy bills.
- Zoning Capability: The ability to heat or cool individual rooms creates a customized and comfortable environment tailored to the preferences of the occupants.
- Space-Saving Design: Since they do not require ductwork, ductless systems save space and can be installed in areas where traditional systems wouldn’t fit.
- Easy Installation: Ductless mini-split installation is generally less invasive, requiring only a small hole for refrigerant lines and electrical wiring.
- Environmental Benefits: Many systems are designed to use eco-friendly refrigerants, contributing to lower greenhouse gas emissions.
Common Misconceptions About Ductless Systems
Despite their benefits, several misconceptions about ductless systems can deter homeowners. One common myth is that these systems are overly complex but, in reality, they offer a straightforward installation and user-friendly operation. Another misconception is that ductless systems are unsuitable for larger homes, but they can effectively distribute heating and cooling throughout expansive spaces with multiple units installed. Lastly, some believe that these units are aesthetically unappealing; however, modern designs are sleek and can blend well with various interior decors.
Preparation for Installation
Before embarking on ductless mini-split installation, careful preparation is essential to ensure a successful outcome. Understanding your space, choosing the right system size, and gathering the necessary tools are critical steps.
Assessing Your Space for Ductless Mini-Split Installation
Begin by evaluating the area where you plan to install the ductless mini-split system. Measure the room’s dimensions to determine how many indoor units are required for optimal comfort. Consider factors like ceiling height, insulation quality, and the room’s purpose (e.g., living area, bedroom, or office). The layout of the space also influences unit placement; aim for locations that allow for optimal airflow without obstructions.
Choosing the Right Size and Capacity
Choosing the right size and capacity for your ductless mini-split system is crucial. Systems are rated in BTUs (British Thermal Units), and an incorrectly sized unit can lead to inefficiencies, increased energy consumption, and inadequate heating or cooling. To determine the appropriate capacity, consult with a professional who can perform a load calculation based on your specific needs, considering factors such as insulation, window exposure, and the number of occupants.
Necessary Tools and Equipment
As with any installation project, having the right tools and equipment simplifies the process. Essential tools for ductless mini-split installation include:
- Drill and drill bits
- Level
- Refrigerant gauge set
- Pipe cutter and bender
- Electrical tools (wrenches, screwdrivers, etc.)
- A vacuum pump (to evacuate the refrigerant lines)
- Safety gear (goggles, gloves, etc.)
Having these tools on hand will ensure you’re prepared for various aspects of the installation process.
The Installation Process
The actual installation of a ductless mini-split system involves several key professionals and steps, whether executed by an experienced technician or a knowledgeable DIYer.
Step-by-Step Guide to Installing a Ductless Mini-Split
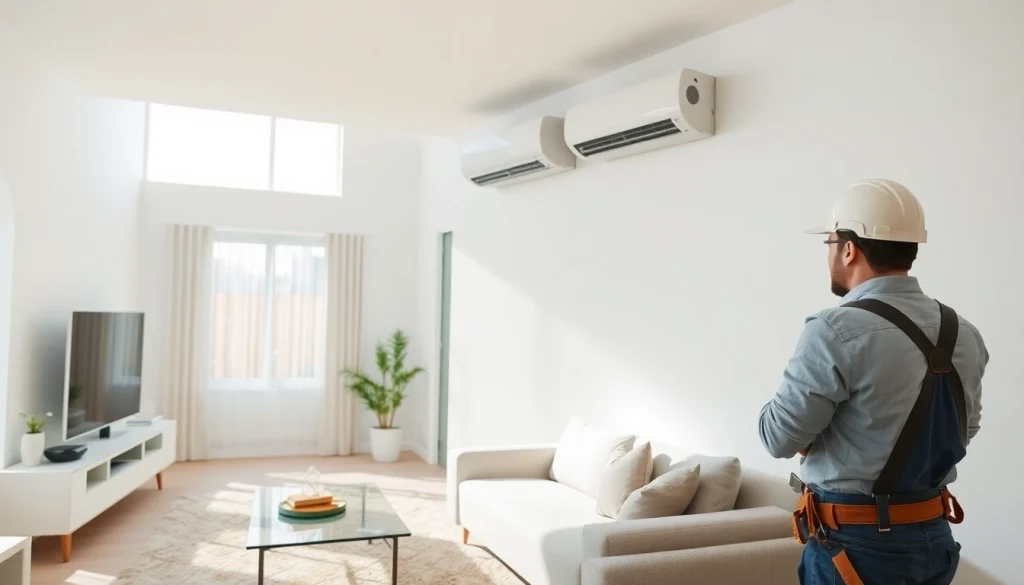
- Select the Location: Position the indoor unit where it can effectively circulate air throughout the room, avoiding hot or cold spots.
- Mount the Indoor Unit: Secure the mounting bracket and install the indoor unit according to the manufacturer’s instructions.
- Drill a Hole for the Line Set: Create a hole in the wall for the refrigerant lines, ensuring it’s aligned with the outdoor unit’s location.
- Install the Outdoor Unit: Place the outdoor unit on a level concrete pad or bracket to ensure stability and proper drainage.
- Connect the Refrigerant Lines: Carefully connect the refrigerant lines to both the indoor and outdoor units, ensuring tight seals to prevent leaks.
- Connect Electrical Wiring: Follow electrical codes to connect the power supply to both units, always prioritizing safety.
- Vacuum the System: Use a vacuum pump to evacuate the refrigerant lines, which will eliminate any moisture or air.
- Test the System: Turn on the system and check for leaks, ensuring that it operates efficiently and effectively.
Important Safety Considerations
Safety is paramount during ductless mini-split installation. Always follow manufacturer guidelines and local building codes to avoid hazards. Working with refrigerants requires specific certifications; if you’re not qualified, it’s wise to hire a professional. Additionally, ensure electrical wiring meets necessary codes. Always wear appropriate safety gear to protect against potential injury during installation.
Common Challenges During Installation
Even seasoned installers can encounter challenges during ductless mini-split installation. Common hurdles include:
- Improper Sizing: As mentioned earlier, choosing the incorrect size will lead to inefficiencies. Always conduct a thorough assessment.
- Refrigerant Leaks: A common issue that can arise from improper connections; always check lines before sealing.
- Electrical Issues: Inadequate wiring can lead to a faulty installation, which is why following electrical codes is critical.
- Airflow Obstruction: Ensure the indoor unit has sufficient clearance around it to prevent airflow blockages.
Being prepared for these challenges will help facilitate a smoother installation process.
Post-Installation Considerations
Once the installation is complete, focus on optimizing your system’s performance and staying on top of maintenance.
How to Optimize Performance After Installation
To ensure your ductless mini-split system operates efficiently, consider these tips:
- Correct Thermostat Settings: Program your thermostat to match your lifestyle, optimizing comfort and energy use.
- Zoned Control: Utilize the zoning capabilities to heat or cool only occupied rooms, saving energy.
- Regularly Clean Filters: Monthly cleaning or replacement of filters prevents airflow issues, ensuring optimal performance.
Regular Maintenance Tips for Ductless Systems
Regular maintenance extends the life of your ductless mini-split system and enhances its efficiency. Schedule annual professional inspections and clean the outdoor unit of debris. Additionally, check electrical components and ensure refrigerant levels are adequate. Keeping an eye on the unit’s performance can help catch potential issues before they escalate.
Dealing with Common Issues
Even with regular maintenance, ductless mini-splits can experience issues. Common problems include:
- Inconsistent Temperature: This could stem from insufficient refrigerant, improper installation, or airflow obstructions. Address these concerns promptly.
- Noisy Operation: If the unit is excessively noisy, check for loose parts or debris in the fan.
- Draining Issues: A clogged drain line can lead to water leaks. Regularly inspect and clear any blockages.
Addressing these issues promptly can save on costly repairs in the long run.
FAQs about Ductless Mini-Split Installation
How long does ductless mini-split installation take?
The installation time for a ductless mini-split system typically ranges from 4 to 8 hours, depending on the project’s complexity and the number of units being installed.
Can I install a ductless mini-split myself?
While it’s possible for skilled DIYers, it is recommended to hire a licensed professional due to the complexities of electrical and refrigerant connections required for optimal performance.
What is the cost range for ductless mini-split installation?
The cost for installing a ductless mini-split system typically ranges from $2,000 to $5,000, considering factors such as the number of units, labor, and system capacity.
Are ductless mini-split systems energy-efficient?
Yes, ductless mini-split systems are known for their energy efficiency, often using 30% less energy compared to traditional HVAC systems when sized and installed correctly.
How do I choose the right location for installation?
Choose a location with minimal obstructions for the indoor unit to maximize airflow efficiency. It’s essential to consider factors like sunlight exposure and proximity to external walls for the outdoor unit.